Tips For Winter Hair Care !!


With the arrival of winter all skin and hair problems start worrying you. Dry and brittle hair, dandruff, hair fall, hair damage are common during winters. Yet the remedies are handy to protect the lustrous locks. Yet Beauty&Fashion Merge brings you most effective homemade tips for winter hair.

Tips to protect your hair:
  1. After a continuous use, your hair care regimen loses their effectiveness. Your hair gets too accustomed to your regular hair care regimen and gets desensitized to the active ingredients needed for keeping it protected. So it is a good idea to break up your hair routine every few weeks by using an alternate shampoo and conditioner for a day or two. This really can make a huge difference on how your hair looks and feels, and you can fall in love with your favorite products all over again.
  2. Keep the split ends trimmed and treat them carefully.
  3. Good conditioners make a lot of difference.
  4. Use apple cider vinegar the same way as you use a conditioner at least twice a week for the shine boost.
  5. Using the homemade hair masks at least once in a week can work wonders for your hair, by controlling the hair fall and making it healthy and shiny.
Olive Oil Hair Mask: Massage a olive oil into the hair and scalp. Use a wide-toothed comb to spread evenly. Cover hair with a shower cap for 15-20 minutes, then rinse well. Shampoo as usual.

Honey and Egg Yolk Hair Mask: Mix well 1 tbsp. honey, 1 tbsp. olive oil and 1 egg yolk. Apply to hair, spread evenly with a wide toothed comb, cover with shower cap and leave on for 30 minutes. Rinse and shampoo as usual.

Oatmeal and Almond oil Hair Mask: Mix well 1 tbsp. oatmeal powder, 1 tbsp. milk and 1 tbsp. almond oil to make a paste. Apply this to hair and leave for at least 15 minutes by covering with a shower cap. Rinse with water and use mild shampoo.

 Feel free to share your experience and questions.!!!


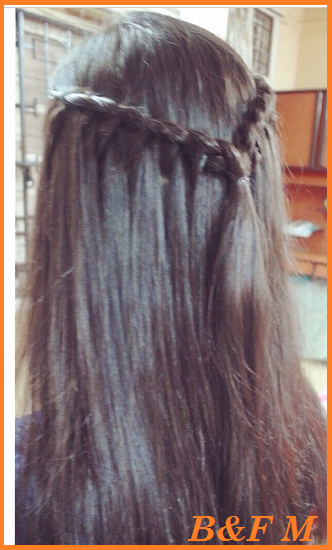
Hairstyles To Try Out Every day !

Simple Hairstyles !!

If you’ve been bored leaving your hair down every single day or wearing the same drab hair style with not much change, worry not. We show you ways in which to make some amazing hairstyles that you can make every day – and these aren’t time-taking too!
1. Sleek Ponytail : It is classy, chic and easy-to-make. It is especially perfect for work wear as it can stay put through the whole day.
 How to get a sleek ponytail : Straighten your hair such that it is sleek and soft and tie it up into a pony – high or low, the way you like it. It’s that simple!
2. The Side Braid : Braiding up our hair is something that we’ve done all through our schooling and hence, it is an easy hairstyle to make for most of us. It can look good with any outfit and can make you look dressy effortlessly. All you have to do is make it side-swept so that it is a tad bit different and prettier than the normal braid.
How to get a side braid : All you have to do is braid your hair (in regular, French or fishtail style), starting the braiding from the lower left or right end of your scalp.
3. The Puff Ponytail : If you have no time to straighten your hair or add curls or just do anything with it except tie it up into a pony, there’s still a way to make it look elegant and that is ‘puffing it up’.

How to get a puff ponytail : It is the simplest thing you can imagine. Tie your hair (yes, even the messy hair that you just woke up with) into a ponytail. But before you do that, comb out a little bit of the frontal part of your hair and make it stand out with the help of bobby pins.
4.Half Up and Half Down Hairstyle : Yet another hairstyle that helps us transform the boring and dreary hair into a dressy up do is the half up and half down hairstyle. Instead of leaving all your hair loose. Pull half of it up and make a knot or a braid or a pony out of it leaving the other half down. It is easy to make and can go with most outfits. And yes, it is one of those hairstyles that most celebs seem to be going for lately.
5.Add a Hair Band : Instead of leaving your hair down like every other day, glam it up a little bit by slipping on a hair band onto the hair.

How to add the hair band : Choosing the right hair band and placing it in on your hair is all it takes. See to it that the frontal part of your hair is puffed up a little bit so that it adds a certain chic-ness to it.

Feel free to share your experience and questions.

Homemade Salon Style Facial .

Facial For Glowing Skin 

Facial helps you cleanse, exfoliate, nourish and rejuvenate your skin and reveals the fresh, glowing, flawless and youthful layers of skin. Salon facials are quite expensive and most of them go ineffective. The products come with strong chemicals and slowly damage the skin ageing it faster than your actual age. Natural facials are the best option, which you can repeat even once or twice every week.

Usually facials involve 5-6 steps. Let us see how to do a salon style facial at home step-by-step:
Cleanser
Use a deep clean facial cleanser like the one from neutrogena to cleanse the face and neck. Massage the cleanser on wet skin for few minutes to remove the impurities and clear the pores. Pat dry with a clean face cloth.

Tone:
Use rose water (Dabur gulab jal) to tone the skin. Wet a cotton ball with a little rose water and wipe the face and neck. Rose water soothes the skin and maintains the pH balance.

Steam:
Fill a bowl with 3/4th water and bring it to a boil. Remove from the stove and steam your face and neck for 10-15 minutes by covering your head with a towel. This will open the pores and loosens the dead cells and stubborn dirt.

Exfoliate:
Now your pores are open and the dirt or dead cells are loosened, it is easy for you to exfoliate more effectively. Use baking soda or powdered sugar mixed with water or honey to exfoliate the skin. Remember to be as gentle as possible, since the skin will be a little sensitive due to steaming. Rub in circular motions on the face and neck concentrating on T-zone for 1-2 minutes very gently and carefully. Rinse well and pat dry.

Massage
It is the most important step of your facial. Use a moisturizer enriched with vitamin-E to massage your skin. Start from the neck and move towards your face by gentle upward strokes. Your finger strokes should be enough to stimulate blood circulation. Use circular movements from your chin towards the lower part of ears. Use gentle circular movements using ring finger around the eyes. Use up and down movements on your nose. Massage for 10-15 minutes very gently on every area of the skin on your face, neck and ears. Wet your hands with cold milk or rose water in between while you massage to smoothly glide your fingers. After massaging, wipe the skin with a clean wet face cloth.

Face mask:
Take a few chunks of apple, papaya and banana in a small bowl. Blend them in a mixer to make a smooth paste. Mix this with 2 tbsp of rice flour. Add little water if required. Apply this mask over clean face and neck after massaging. Leave for 15-20 minutes. Rinse well and pat dry.

Ice cube:Now rub an ice cube over the face and neck to close the pores. This is important to keep the skin fresh and glowing.

Serum:
Apply a moisturizing serum over the skin and massage gently.

Sunblock
Must apply a apply sunblock to protect your skin from UV rays ,must after a facial if you are going out.

 Feel free to share your experience and questions.

Papaya Skin Brightening Face Mask !


Face Mask Using Raw Papaya :\:


Several factors make the skin dull and cause blemishes which should be regularly treated to keep the skin healthy and radiant. Here is a powerful face mask using raw papaya, yogurt and honey to brighten up the skin by gently exfoliating the dead layers of the skin. This face mask stimulates blood circulation and makes the skin surface radiantly glowing.

How to prepare:                                                  

1/2 cup raw or semi ripe papaya (peeled and chopped)
2 tbsp. plain yogurt or thick curd
2 tbsp honey
Blend the papaya pieces to make into a smooth paste. Mix well with yogurt and the honey. Apply this paste over a clean face and neck. Leave for 15 minutes and rinse. Left over face mask can be stored for later use.


HOW IT WORKS :


In this face mask we use unripe papaya. It contains natural alpha-hydroxy acids and the levels of papain, an enzyme that dissolves dead skin cells, is in huge amounts when compared to ripe papaya. This makes it a very powerful ingredient in many cosmetics to brighten up the skin. In case you have a sensitive skin, you should use ripe papaya or semi ripe one, instead of raw papaya. Raw papaya gives you mild exfoliation.
On the other hand yogurt or curd also contains aplha-hydroxy acids and acts as a catalyst to improve the action of papaya on skin, while making it softer and fresher. Honey is a great humectant and keeps the skin hydrated.

USAGE :

The face mask gives a slight tingling sensation which is common. This face mask should be used 1-2 times a week.

 *Please feel free to share your experiences and questions. Would love to hear.

Miraculous Benefits of Aloe Vera for the Hair !!

Aloe Vera for the Hair


It can not only make you healthy, it also imparts a definite glow and sheen to your hair and skin when used. Aloe Vera extract has also got plenty of Vitamins such as Vitamin B 12 and folic acid which are responsible for the rejuvenation that comes with using it.
The benefits of Aloe Vera for the hair and how it can be put to its best use for the hair, read on..

Helps Prevent Drying up of the Hair

The best possible use that Aloe Vera has on your hair is it’s hydrating property. If you’re one of those people with an extremely dry and rough hair, using Aloe Vera extract for your hair can help prevent the dryness and thereby other problems that come along with dryness such as hair fall and dandruff.

Balances out the pH of the Hair When there is a persistent hair problem that you just can’t seem to rid yourself of, be it hair fall or an itchy scalp, it is very likely because of an imbalance in the Ph of the hair. Upon using Aloe Vera juice on a regular basis, the balance of Ph can be restored and thereby, many problems that revolve around that can finally be put to an end.

Anti Fungal in Nature Aloe Vera has got anti-fungal and anti-microbial properties. Since fungus is responsible for most of the scalp infections that cause inflammation and itching, application of Aloe Vera extract is a great means to fighting these infections. It also helps prevent the occurrence of such infections and keeps the scalp and hair healthy.

Helps with the growth of the hair
While many chemical products promise to help with hair growth in balding or thinning areas, they seldom show any results. Aloe Vera juice, however has got miraculous effects on restoring the growth of the hair. It helps by cleansing the scalp and de-clogging the hair follicles which helps hair grow rapidly and into thicker strands.

Constant use of Aloe Vera onto your hair can transform your hair into the shiny and glistening mane that you’ve always wished for.

Thank you .

Age old secret for skin lightening !

Rice powder

Chinese women have inherited a natural face mask from their ancestors to keep their skin fairer from the deep layers of skin. You will be surprised to know that it is one of the most important ingredient found in Indian kitchen. Its nothing but rice powder.
How rice powder works?                            

  • Rice contains a high amounts of PABA(para amino benzoic acid) which is a strong sunscreen.
  • It contains huge amounts of Ferulic acid which is an antioxidant. Scientists have found that when ferulic acid is added to Vitamin C and E, its sun protection ability doubled.
  • Allenton is a good anti-inflammatory agent. It soothes sunburns and also promotes the skin’s repair.
  • When applied as a paste on the skin, rice powder inhibits tyrosine, which is an enzyme responsible for melanin production(responsible for skin completion).
Rice face mask:
  • Take a hand full of rice and grind into a very smooth powder. Alternatively you can also use rice powder available in stores.
  • Add some raw milk to the powder and mix to make a smooth face mask.
  • Apply this paste over the face and neck. Leave for 20 minutes and rinse with water.
  • Repeat twice a week or after exposure to sun.
  • When you soak rice in water, store the white water that you get, to splash on your face several times a day. This is a great skin cleanser and also promotes brighter complexion.
 *Please feel free to share your experiences and questions. Would love to hear.

Solution to Dry, Flaky and Brittle Nails.

Hot Oil Manicure :

I love nail art and this small sentence does no justice to explain my passion for it but keeping nails healthy and nourished is of prime importance. And no nail art or expensive polish will look good, if your nails and cuticles do not support them. Before asking the nail art or the fancy polish to make you nails look gorgeous , please ask your self did you do enough for your nails????
Hot Oil manicure ?

It is a luxurious and relaxing treatment for pampering your hands. It is best suited for dry and ribbed nails, damaged cuticles and brittle flaky nails.
However  my regular readers would know that I never endorse expensive products or difficult treatments. I am more of a researcher who comes up with Do It Yourself substitutes. So, here is a DIY Hot Oil Manicure that everyone can easily do sitting at home .

How to do ??                                                     

Some of the oils used for this are Vitamin E oil, Olive Oil, Sunflower Oil, Castor Oil mixed with lower density oil, Almond Oil etc. All you have to do is warm the oil for a 30 sec or so in the microwave. The oil should not be too hot and bearable
The reason of using warm the oil is that the density of the oil decreases (so oil thins down) when we heat them, hence they can now easily penetrate into the skin.
Now, dip your hands in the warm oil till the oil cools off. If you enjoyed this, do not hesitate in reheating the oil again for like a 20 sec and repeating it .
Take out your hands from the oil and massage your hands and wrist. Pay special attention to the cuticle, nail bed and nail edges.
Keep in mind that you are feeding the thirsty nails and hands with real good food. So don’t stop too soon.
Wash your hands with plain water after some massage and wipe them.
You can do the regular pushing your cuticles and removing the dead skin as well. If you wish you can proceed with nail paint application step of the manicure after getting rid of the oiliness from your nails.

I would suggest this as a before bed ritual so that you are touching around things interrupting the healing process.

I hope you enjoyed this post and would use this to pamper your nails and hands.

 *Please feel free to share your experiences and questions. Would love to hear.